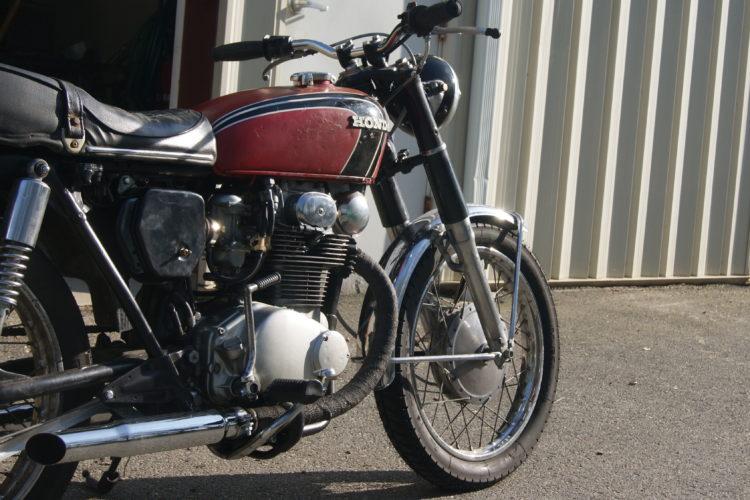
A very familiar bike around my website and social media pages is my ’72 Honda CB350. There are a couple good reasons for that. One is that it is one of the only bikes I have that reliably starts and runs properly every time. The second is because the bike is pretty special to me.

Its a lot like how people feel when they rescue a pet from the shelter or when they nurse a baby bird back to health who fell from the nest.
I rescued this 350 from a purgatory where it sat with a crankcase full of 15 year old fuel! Covered in rust and corrosion and oozing battery acid it sat, doomed.
Until I came along one day and everything changed. Yeah… you know, we are kinda tight.
I am riding the bike now for the second season, and I have struggled since I first put this thing together to get a good balanced air fuel recipe.
The bike has after market shorty mufflers, and they have internal baffles installed in them.
They are the metal perforated-cylinder type, and are wrapped with a fiberglass type of mat. These came in the mufflers and I left them there when I installed them.
I also tried running cheap pod filters instead of the factory air filters. The bike ran like total garbage and wouldn’t make any power.
Turns out they have a little lip or a step-up on the inside of the rubber boot that connects to the carb. This causes turbulent flow into the mouth of the carburetor and interferes with an air circuit within the carb. These are Keihin constant velocity, or CV carbs on this bike.
If you look into the inlet side of the carb, you will see three small brass orifices. Pinhole sized openings. That is where the pod filters are screwing you.
Now I have heard that if you spring for the K&N brand pod filters that this problem doesn’t happen as much, or as bad, or at all, I don’t know to be honest.
This problem was enough to make me put the factory air filters back on because the bike ran much, MUCH smoother with those over the pod style filters.
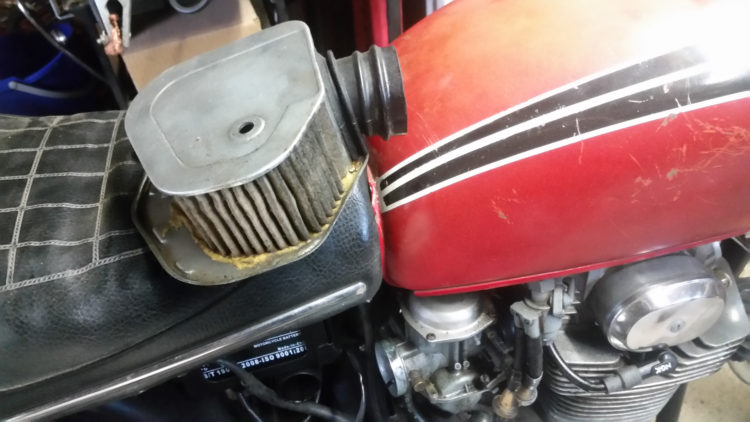
I blew the 45 year old filters out with compressed air and cleaned them the best that I could.

I had decent luck with this setup and it is what I rode for most of the season last year. That is until the end of the season when I blew one of the baffles clear out of the pipe, and the other broke into two pieces, and lodged its self in the pipe. All of the fiber packing around the baffles was gone. Slowly incinerated is my only practical guess.
So, after that I was essentially wide open straight pipes. The inner diameter of the muffler is only slightly larger than the head pipe. This, of course sounded awesome. But, its over-the-top loud for this little bike.
Also, with the lack of restriction in the exhaust department, the bike was totally lacking in top end.

These are the new replacements from Drag Specialties. A little dirty because I had to make sure they fit!
I ordered some new baffles for the pipes at the beginning of this season. It was hard to find them, but Drag Specialties made something the right diameter and length, I just had to drill a new hole to set the screw in place. All in all, I’d consider it a fairly direct replacement.
I put these in the pipes, still running the stock air cleaners, and the bike started and ran fine. It just seemed to be lacking a bit now though. It clearly was a little choked up because the plugs had been looking a little on the dark side. It was a feel thing too, when the baffles went it felt obvious that the bike wanted to breathe more.
I decided that since the stock air cleaners were delivering an even flow that the carburetors worked well with, then I would try to update and improve the filter material.

This is really easy to do and there are not many things you would need to give it a shot. Some stuff you need…
- Uni brand foam filter material
- A razor blade or boxcutter
- RTV or silicone gasket maker stuff
- 4 Rubber bands.
First, I carefully cut out all of the paper mouse nest material that the air cleaners had on as factory filters with a razor blade. I trimmed the paper down as low and close to the surface as I could. I tried not to leave any fuzz or fibers behind when I could help it.

It’s important to be very careful when cutting. If you cut too deep you can cut, damage, or dislodge the screen underneath the filter material.

We want that screen intact and where it is for this, but if you do screw it up its not the end of the world.
I used red RTV to do this because that is what I had handy. Black would have looked a little better maybe. A clear silicone is a possibility here too, but the most important thing is to try and keep what is already there intact. That way the RTV is doing little more than holding the foam in place.
The more the screen comes off of the metal plates the more RTV you will need to build up and let dry to hold the screen in place. Again this is possible, but not optimal.
Try not to mess up the screens, or the glue holding them down.
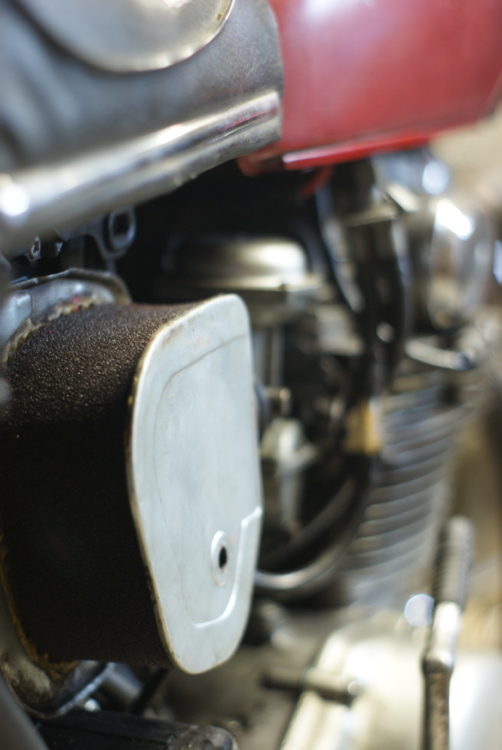
After the gross 45 year old mouse nest material is trimmed back and you didn’t mutilate the screen on the other side, we can measure and cut two strips of Uni filter material that will fit snug in the metal housing and lay flat around the entire screen.

My high-tech tools and ultra-clean work surface.
After we have our new filter material cut we can reinforce the joint between the metal plates and the screen with a bead of RTV. Use more if you have gaps or damage.

I let this first bead set all around on both air cleaner assemblies. Then I laid a fresh bead of sealant down right on top and gently pressed it down on to the RTV to hold it in place.

I never said a thing about it being pretty…
Now, I didn’t squeeze the hell out of it so the sealant came through the foam or smashed the foam its self flat. Your foam should be snug enough to fit firmly in place and then simply wrap two medium sized rubber bands around it to hold the foam down along either edge.
Let that all set over night and then throw them back on the bike.

Please, use common sense here.
Don’t leave holes or gaps for crap to get in to your carb or motor. Also… Don’t install anything that looks like it will fall apart, melt, burn, fly off the bike, keep the bike from stopping, or injure anybody around you.
Thanks.

This method worked out great for me and I felt instant results when I got on the bike.
I took the bike up on the highway and buzzed round back roads at the top of 5th and felt a definite increase in top end power. The bike goes faster and pulls harder than it did before. Its still a 350, but it feels substantially faster in comparison to the previous set up.
The increased air flow gives the low end an un-corked feeling, similar to the straight pipe setup, but with the back pressure in the mufflers now to carry the power way up into the top end.
I had never been pulled over for speeding on a bike in my life, and the first time out with this setup I got nabbed going 63mph on a back road. (pic on instagram)
For some reason he let me go with a warning, which was rad. Either way though, I was ripping around like that because it felt like a different motorcycle to me.

It was an easy little project and an interesting experiment as far as tuning air fuel ratios with restrictions to the air system. These CV carbs are particularly picky in this department, and I am happy the results were positive.
I hope to make a bracket and mount some small gauges to the bike this year… maybe then I won’t need the police to tell me how fast I am actually going.
Let me know if you have any questions about what worked for me, or if you see me doing something that you think is nuts!
Thanks for reading!
LMYR

